Setting Up Applications and Projects in JDeveloper
In JDeveloper, you create your work in an application, within which you can organize your work into a number of projects. JDeveloper provides a number of application templates, to help you to create the project structure for standard types of application relatively quickly and easily. At the time you create your application in JDeveloper, you can choose the application template that matches the type of application you will be building.
The application template you select determines the initial project structure (the named project folders within the application) and the application technologies that will be included. You can then add any extra libraries or technologies you need for your particular application, and create additional projects if you need them.
Using the JDeveloper Application Navigator
The Application Navigator displays all your applications and projects. When you first start JDeveloper, the Application Navigator is displayed by default on the left side of the JDeveloper IDE.
To view the Application Navigator when it is not displayed, you can click the Applications tab in the navigator panel on the top left-hand side of the JDeveloper display, or select Application Navigator from the View menu.
The Application Navigator shows a logical grouping of the items in your projects. To see the structure of an individual item, you can select it and the structure is displayed in the Structure window.
From the Application Navigator, you can display items in an appropriate default editor. For example, if you double-click a Java file, the file opens in the Java Source Editor, and if you double-click a JavaServer Pages (JSP) file, it opens in the JSP/HTML Visual Editor.
Creating an Application and a Project
To get started with JDeveloper, you must create an application and at least one project in which to store your work, as follows:
- In the Application Navigator, click New Application.
- The Create Generic Application wizard is displayed. In the Name your application screen, enter
HRAppin the Application Name field, and from the Application Template list, select Generic Application. Click Next. - On the Name your project screen, enter
Viewas the name of the project. Click Finish. - The new
HRAppapplication is displayed in the Application Navigator. - Save your application. To do this, from the File menu, select Save All.
Viewing the Javadoc and Source Code Available in the Project Scope
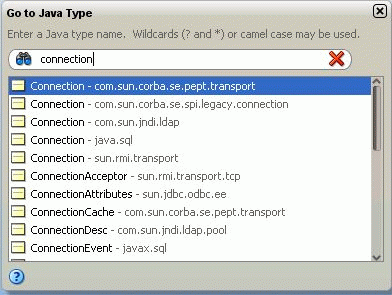
You can view the Javadoc or the code for any of the classes available in the project technology scope within JDeveloper. In addition, you can view the details of all the methods available for those classes.
For example, to see the code or Javadoc for the Connection class, do the following:
