Creating a JSP Page to Handle an Insert Action

In these steps, you create the insert_action.jsp page. This is a page that processes the form input from insert.jsp, which is the page on which users enter a new employee record. There are no visual elements on this page, and it is only used to process the insert.jsp form and return control to the employees.jsp file.

  1. Create a JSP page as before. Call it insert_action.jsp.
  2. Add a jsp:usebean tag. As before, enter empsbean as the ID, and hr.DataHandler as the Class. Set the Scope to session, and click OK.
  3. Position the cursor after the useBean tag and add a Scriptlet to the page. Enter the following code into the Insert Scriptlet dialog box:
    String first_name = request.getParameter("first_name");
    String last_name = request.getParameter("last_name");
    String email = request.getParameter("email");
    String phone_number = request.getParameter("phone_number");
    String job_id = request.getParameter("job_id");
    Integer salary = new Integer(request.getParameter("salary"));
     
    empsbean.addEmployee(first_name, last_name, email, phone_number, job_id, salary.intValue());
    
  4. Drag a jsp:forward tag onto the page. In the Insert Forward dialog box, enter employees.jsp.
  5. Save your work.
  6. Run the View project to test whether you can insert a new employee record.

To insert an employee, click Insert Employee on the employees.jsp page shown in Figure 5-7.

Figure 5-7 Inserting New Employee Data

Description of Figure 5-7 follows
Description of "Figure 5-7 Inserting New Employee Data"

Figure 5-8 shows the page where you can insert new employee data with some data filled in, and the list of jobs being used to select a job.
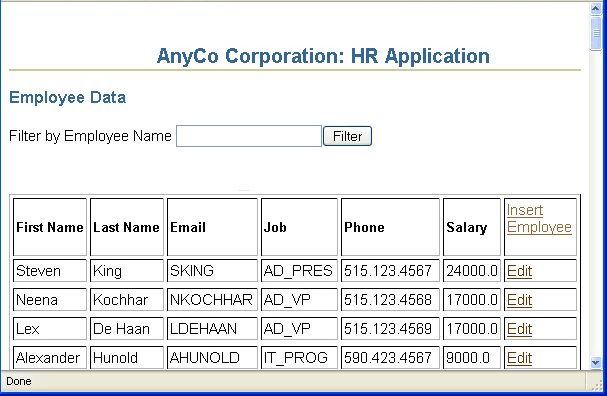
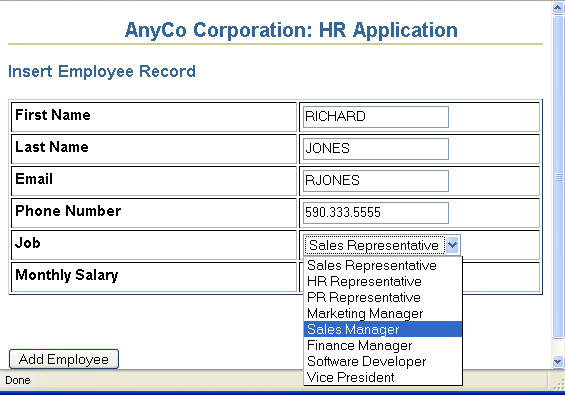
Figure 5-8 Inserting Employee Data

Description of Figure 5-8 follows
Description of "Figure 5-8 Inserting Employee Data"